Showing posts with label School Progress. Show all posts
Showing posts with label School Progress. Show all posts
Tuesday, April 5, 2016
Official Graduation Evaluation
I received my official graduation evaluation in the mail. Everything is on track to graduate in June with Associate of Science degrees in Culinary Arts and Baking and Pastry. Assuming I pass this semester's classes.
Monday, June 1, 2015
Fantasy Menus: part 2
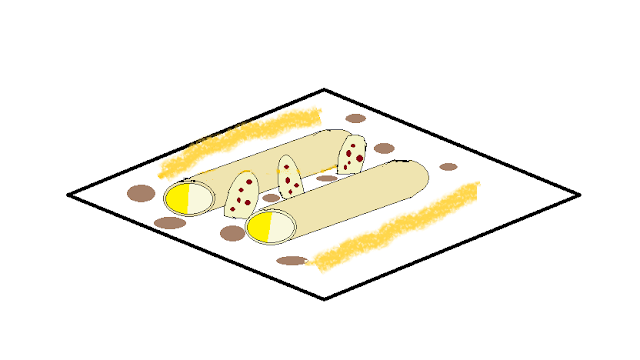
For my second fantasy menu, I did an early spring menu. Again, the emphasis is on using seasonal flavors, and trying not to repeat flavors. Early spring is almost as difficult as late winter. Some of the berries have come in, but stone fruit is still a month or two away. I tried to bring in a few more exotic items, but not too odd.


Spring
Dessert Menu
Chocolate
Orange Cake with Tequila Orange Sherbet
Chocolate
chiffon cake, Triple Sec buttercream, tequila orange sherbet, rolled
pizelle with orange pastry cream, candied orange slice, chocolate
Triple Sec sauce

Strawberry
Shortcake with Greek Yogurt Gelato
Shortcake,
macerated strawberries, Greek yogurt gelato, gewürztraminer rhubarb
reduction sauce, crisp meringue chip, whipped cream, candied rhubarb
twist.

Cherimoya
Custard
Cherimoya
custard, diced fresh mango, caramelized dried banana chip, lemongrass
sauce, tangerine cotton candy

Sweet
Lime Meringue Pie
Sweet
lime Meringue pie with salty pretzel crust, candied lime peel,
candied ginger brittle, ginger lime sauce

Chocolate
Crepes with Dark Chocolate Mousse
Chocolate
crepes, dark chocolate mousse, chocolate chocolate chip ice cream,
chocolate tuile, chocolate tawny port sauce, chocolate curls

New
York Style Lemon Ricotta Cheesecake
Lemon
ricotta cheesecake with Graham cracker crust, almond brittle, candied
green almonds, thyme sauce
.

Thursday, May 7, 2015
Fantasy Menus part 1
In my Advanced Baking class, our homework assignments were to create two fantasy dessert menus. I thought you all might like to see them. It was quite a challenge. We had to create six desserts. We were to use seasonal flavors, avoid repeating flavors, and have both light and heavy desserts.
My first menu was a late winter menu. I kept to in season fruits and vegetables, and wanted to avoid holiday season flavor combinations.


 Warm
Chocolate Chip Bread Pudding
Warm
Chocolate Chip Bread Pudding


My first menu was a late winter menu. I kept to in season fruits and vegetables, and wanted to avoid holiday season flavor combinations.
Late
Winter Dessert Menu
Chocolate
Silk Meringue Pie
A
chocolate silk pie with a chocolate Graham cracker crust, and a
toasted meringue topping. Served with a tawny port reduction sauce
and a dark chocolate curl garnish.

White
Chiffon Cake with Kiwi Curd
Three
layers of white chiffon cake with kiwi curd, and Gran Marnier
buttercream frosting. Served with cashew brittle and coconut cream
mango sauce.

Trio
of Small Tastes
Three
different small desserts. A chocolate lace cookie cup with a
tangerine pastry cream and a twist of candied tangerine peel. A
creampuff filled with a lemon mousse and dipped in white chocolate
and topped with chopped pistaschios. A lavender custard tart with an
elderberry tea shortbread crust. Served with basil sauce.
 Warm
Chocolate Chip Bread Pudding
Warm
Chocolate Chip Bread Pudding
A
warm chocolate chip bread pudding with Irish Creme ice cream, mint
sauce, and a crisp whiskey meringue chip.

Guava
Panna Cotta
Guava
panna cotta, passion fruit sauce, cardamon tuile, pulled sugar
garnish.

Butternut
Squash Mousse and Mascarpone Crepes With Bourbon Raisin Ice Cream
Crepes
filled with butternut squash mousse and mascarpone, with bourbon
raisin ice cream, cinnamon orange sauce, and candied pecans.

.
Tuesday, June 17, 2014
Sugar Class: Sweet Treats
Most of what we are doing in sugar class is decorative pieces. Yesterday, we had the one day where we made things you actually want to eat. We made lollipops, pillow candies, and making marshmallows. We then practiced making hard caramel decorations.
 Lollipops are fairly easy. You cook sugar to hard crack stage. then add color and flavor. We used metal spring molds. You grease them lightly, then clip in the stick, and place it on a silicon baking sheet. Fill the molds with the hot sugar.
 Pillow candy is made by heating sugar to hard crack stage. Add flavor. Pour half on to a silicon pad, then add color to the other half. At it cools, roll it up, and stretch it to add air and it becomes shiny. Roll out each color, and stick together. Stretch and fold to produce stripes. Stretch and twist, and cut into inch long pieces. Let harden on non-stick surface.
 Marshmallows are fairly simple. Sugar is cooked to soft ball stage. Then place in a stand mixer with gelatin. Whip until fluffy and cooled to just warmer than room temperature. Add color and flavor, whip to incorporate. Transfer to an eight by eight pan that is lined with greased plastic wrap. Dust with a mixture of equal parts powdered sugar and corn starch. Press into pan. Let set, turn onto a cutting board and cut into squares. Toss with more powdered sugar and corn starch.
Pillow candy is made by heating sugar to hard crack stage. Add flavor. Pour half on to a silicon pad, then add color to the other half. At it cools, roll it up, and stretch it to add air and it becomes shiny. Roll out each color, and stick together. Stretch and fold to produce stripes. Stretch and twist, and cut into inch long pieces. Let harden on non-stick surface.Recipes
Lollipops
7 oz. by wt. sugar
3 3/4 oz. by wt. corn syrup
4 oz. by vol. water
1 tsp. flavor extract
1 tsp. water
1/4 tsp. citric acid
artificial color
Combine 1 tsp. water, flavor extract, citric acid, and artificial color. Set aside.
Combine sugar, corn syrup, and water in a small pot over medium low heat. Cook, swirling occasionally, to 300 F. Remove from heat, add flavor mixture. Swirl to combine. Pour into prepared molds, allow to solidify before unmolding.
Ribbon Candy
14 oz. by wt. sugar
6 oz. by vol. water
3 oz. by wt. corn syrup
1 tsp. water
1/2 tsp. citric acid
1 tsp. flavor extract
Dissolve citric acid in 1 tsp. water. Add flavor extract. Set aside.
Combine sugar, corn syrup, and water in a small pot over medium low heat. Cook, swirling occasionally, to 300 F. Remove from heat, add citric acid mixture. Swirl to combine.
Pour half of sugar mix onto a silicone mat. Add color to remaining half, swirl to combine. Pour onto a separate location on the mat.
As they cool, roll up. When cool enough, stretch until shiny and opaque. Roll into 12" rolls, stick together, fold and stretch to form stripes. Stretch and twist. Snip into one inch lengths. Let cool on a non-stick surface.
Marshmallows
Mix together equal parts cornstarch and powdered sugar. Set aside.
3/10 oz. by wt. powdered gelatin
2 oz. by vol. water
Combine water and gelatin. Let stand at least ten minutes.
6 oz. by wt. sugar
1/2 cup corn syrup
3 oz. by vol. water
1 tsp. flavor extract
1/8 tsp. salt
Line an 8" by 8" with plastic wrap. Lightly grease, set aside.
Combine sugar, corn syrup, and water in a small pot over medium low heat. Cook, swirling occasionally, to 238 F. Move to the bowl of a stand mixer. Add gelatin. Whip on high speed until fluffy and cooled to just warmer than room temperature. Add flavoring, salt, and color. Whip until well combined. Transfer to pan. Dust with cornstarch mixture. Press into pan to level.
When cool, dust a cutting board with cornstarch mixture. Turn marshmallow onto board. Cut into squares. Toss with more cornstarch mixture.
Happy eating!
Friday, June 13, 2014
Fruit and Vegetable Carving Class: First Week

We then used half an onion as a base, and created a bouquet from them. We arranged them with the largest in the middle, then worked outward with smaller and smaller flowers. The spaces between the flowers are filled in with parsley to hide any visible toothpicks.

flowers, by first incising lines on the faces of the carrots before cutting the flowers from the squared carrots.
We also made more elaborate bases, by cutting steps in a turnip and a potato.With the turnip, we just cut broad gradated platforms. On the potato, we cut small, spiralling staircases.
We then made some simple characters. We made a fish from a lemon, and frogs from limes.

For the fish, we cut a simple mouth, took off thin slices to form eyes. We used slices of black olive for the pupils. We cut for the gills, and used carrots to make fins and the tail. We cut strips of cucumber skin to make seaweed. The fish was mounted on the turnip, then some of the carrot flowers and some parsley was added to finish the scene.
For the frogs, large mouths were cut, and small patches removed to make the eyes. Again, slices of black olive were used to make the pupils. the skin of the section removed for the mouth was used to make the feet. A bit of radish skin was used for the tongues. We used carrot to make hats. I made a top hat and a winged helmet for my frogs. The frogs were mounted on the potato, and additional decoration of carrot flowers added.
This is turning out to be a fascinating class. I am curious to see where this takes me.
Wednesday, June 11, 2014
Start of Summer Classes
I am taking two classes this summer. I am taking Sugar Work, and Fruit, Vegetable, and Ice Carving. I have already had the first two days of Sugar. We had a short lab yesterday, preparing colored isomalt for future projects. It was interesting.
Today I start my carving class. I have already ordered my carving kit. It will be an intense 6 weeks.
Today I start my carving class. I have already ordered my carving kit. It will be an intense 6 weeks.
Thursday, June 5, 2014
Spring Semester Grades
I already mentioned I got an A in my sanitation class. I checked the grades on my other two classes.
 For my Cooking for Healthy Lifestyles class, we had to do a group practical final. We had to produce a healthy three course meal.
We decided on a Mediterranean style meal, with a pan-Middle Eastern style.I think it worked well. We did a good job working together as a team to produce both the menu and the final project.
 For our appetizer, we made hummus, and served it with a variety of crudites.
This hummus was flavored with cilantro and a little jalapeno to give it a kick.
To be healthier, instead of using pita bread, we served it with celery, carrots, and yellow bell pepper. This also gave a lot of color to the plate.
 For our main dish, we had a bed of couscous with peas and raisins. On top of that was Lebanese Orange Chicken.
To accompany the meal is a Greek salad with marinated onions and cucumbers, kalamata olives, tomatoes, and julienned carrots.
Also with the dish are spicy Moroccan style vegetables with sweet potato, leek, onion, and zucchini.
 For our dessert, we made a coconut milk panna cotta with fresh strawberries.
To make it more vegan friendly, it was made with agar agar instead of gelatin. It is garnished with a little toasted coconut.
We can't complain. We got an a on the final, and with that and 100% on my written final, I secured a solid A for that class.
 For my cake decorating class, our final project was to make a dummy wedding cake. The core of the cake was Styrofoam, as the object of this exam was testing decorating skill, not cake baking.
My partner and I chose to make an Indian inspired cake. We used the peacock, lotus blossoms, and henna patterns in the design of the cake.
The cake is covered in a light ivory fondant. We wanted a blank canvas for the elaborate decorations we had planned.
The body of the peacock is made of colored fondant.
The tail is piped royal frosting.
The lotus blossoms are made from wafer paper. They were cut out, air brushed, then assembled.

on the other side are some fondant ropes framing piped henna patterns in purple and gold.
I'm really proud of this cake. I think it came out quite nice. We scored a 9.4 out of ten on it.
I managed an A+ in this class, which was a better grade than I thought I would get. I was expecting a B or at best a B+.
This was a relatively unstressful semester, though I did occasionally get stressed out over my lack of piping skills.

 Next up for summer: Sugar work, and fruit carving.
We decided on a Mediterranean style meal, with a pan-Middle Eastern style.I think it worked well. We did a good job working together as a team to produce both the menu and the final project.
This hummus was flavored with cilantro and a little jalapeno to give it a kick.
To be healthier, instead of using pita bread, we served it with celery, carrots, and yellow bell pepper. This also gave a lot of color to the plate.
To accompany the meal is a Greek salad with marinated onions and cucumbers, kalamata olives, tomatoes, and julienned carrots.
Also with the dish are spicy Moroccan style vegetables with sweet potato, leek, onion, and zucchini.
To make it more vegan friendly, it was made with agar agar instead of gelatin. It is garnished with a little toasted coconut.
We can't complain. We got an a on the final, and with that and 100% on my written final, I secured a solid A for that class.
My partner and I chose to make an Indian inspired cake. We used the peacock, lotus blossoms, and henna patterns in the design of the cake.
The cake is covered in a light ivory fondant. We wanted a blank canvas for the elaborate decorations we had planned.
The body of the peacock is made of colored fondant.
The tail is piped royal frosting.
The lotus blossoms are made from wafer paper. They were cut out, air brushed, then assembled.
on the other side are some fondant ropes framing piped henna patterns in purple and gold.
I'm really proud of this cake. I think it came out quite nice. We scored a 9.4 out of ten on it.
I managed an A+ in this class, which was a better grade than I thought I would get. I was expecting a B or at best a B+.
This was a relatively unstressful semester, though I did occasionally get stressed out over my lack of piping skills.
Monday, March 31, 2014
Sanitation Class final grade
Finished the one credit sanitation class with an A. Other than memorizing specific temperatures for specific foods, it was really just a matter of common sense and be aware of what you are doing.
Saturday, March 1, 2014
Healthy Lifestyles Class: First Cooking Lab
We finally got around to actually cooking in my healthy lifestyles class. It is interesting to note the significant difference in how Chef Kim organizes his labs vs. how Chef Joe does. Chef Joe is a very rigid authoritarian. He requires everyone to wait to do anything until he authorizes the specific action. He also allows only limited variation from his recipes for the session.
In contrast, Chef Kim gave us a pile of material, six techniques to demonstrate, and freedom to decide which vegetables to use for which techniques, how to cut the vegetables, and who was to do what. It was an interesting experience.
We were given some zucchini and yellow squash, carrots, tomatoes, and broccoli. We were to demonstrate six techniques: sauteing, stir frying, steaming, poaching, braising, and en papillote (in parchment). The other members of my team quickly claimed various methods, leaving sauteing and braising for me. I was the only one to do two techniques.
I thin sliced some carrots, yellow, and green squash for sauteing. I was happy that I was able to saute the vegetables just by flipping them in the pan. I did not use a spoon or spatula at all. I cooked the carrots for about a minute before adding the squash. It went quickly, as it should.
I then went back and thick cut some of each squash for braising, and cut up some chunks of tomato. I seasoned some water with salt and pepper. Once it was up to a simmer, I added the squash and covered the pan. I let it cook for a bit, then added the tomatoes. Once the squash was cooked, I removed it from the water.
I felt I did a good job. My team thought the braised veggies were the best, and the sauteed the second best. Chef liked both as well, and thought I had properly cut the vegetables for both. The only criticism was that I had been a tad aggressive with the pepper in the sauteed veggies, and I think that was a fair cop.
We also were to create two flavored vinegars and a flavored oil for doing salads next week. We made a red wine vinegar with blueberries and lemon, and a white wine vinegar with thyme and lemon. For the oil, we went with a classic, garlic and rosemary. Apparently so did all the other tables, independently.
Should be an interesting semester.
Tuesday, February 4, 2014
First Week of Classes
January was a bust for blogging, sorry. Between breaking my laptop, and dealing with a resurgence of my clinical depression, I didn't get a lot done.
Last week Spring semester started. I am taking three classes this semester. I have a class on sanitation, which should be fairly simple. I also have a class on cooking for healthy living. Finally, I have a class on cake decorating, which won't begin until April.
I'm a little bit concerned about the healthy living class. I'm afraid I will be the lone skeptic. I'm picking up a major anti-GMO vibe, and am afraid there will be some very pro-woo moments. I hope I am wrong.
Monday, December 9, 2013
Intermediate Culinary and Bread Classes: Final Grades
For my bread class, our practical final was to make a loaf of sourdough bread from then starter we created in class. I was pretty happy with mine. We had to submit a slice, with a short description of our experience. We also had a short written final, with questions about types of flours, and types of pre-ferments for making bread. I don't know exactly what my score was on either, but I can infer that both were good, as the posted grade for the course was an A+.
 For my intermediate culinary class, we had a practical final where we had to make a composed salad and a stable vinaigrette. This is my salad. It is baby greens with yellow bell pepper, candied pine nuts, feta cheese, Persian cucumbers, kalamata olives, baby red onions, and pomegranate seeds. I made a cracker of puff pastry with a pomegranate molasses glaze. My vinaigrette was olive oil, pomegranate red wine vinegar, red currant mustard, and fresh basil. I got a 43 out of 50.
On the written final, I scored 42 out of 50. That gave me a final of 184 out of 200 points for the class, or a 92% and therefore an A.
I can live with that.

On the written final, I scored 42 out of 50. That gave me a final of 184 out of 200 points for the class, or a 92% and therefore an A.
I can live with that.
Wednesday, December 4, 2013
Bread Class: Tef Paper
For my bread class, we were required to write a paper on a type of flour. I decided to do it on tef, an ancient grain grown in east Africa, and only recently becoming popular in the US.
We finally got our papers back today, and I am happy to say I got an A+. Yay!
So, here is my paper, just in case anyone is interested.
Works Cited
We finally got our papers back today, and I am happy to say I got an A+. Yay!
So, here is my paper, just in case anyone is interested.
Tef
Tef
is an ancient grain which until recently was almost entirely limited
to Ethiopia and Eritrea Tef is a grass, and has the smallest seed of
any domesticated grain. It can be grown in areas that other grains
find inhospitable. Tef has recently caught the attention of those
needing a gluten free diet, as it has a negligible amount of the
protein.
Tef
is the only domesticated member of the large Eragrostis
family
of grasses(Ingram, 2003). It's exact ancestor species is unknown, but
there are a number of similar wild species of eragrostis
that
are gathered during times of food scarcity(National Research Council,
1996). The primary difference between tef and closely related wild
species is that in tef the seed head remains intact at maturity,
facilitating harvesting(Ingram, 2003). Tef has the smallest seed size
of any domesticated grain. This allows a large area of ground to be
sown with a small volume of grain. The straw makes nutritious fodder
for livestock. Tef is adapted to a variety of terrains , but does
especially well in dry uplands, where other crops have trouble.
The
exact time of tef's domestication is uncertain. It appears likely
that some time between 4000 and 1000 BCE was when the grain was
domesticated (Ketema, 1997). It has been speculated that tef may have
been first raised by pastoralists as foster for animals, and only
later became a primary food source for human (D'Andrea,
2011).
Tef is the
overwhelmingly most popular grain in Ethiopia, occupying more than
half the acreage used for growing grains (National Research Council,
1996). Several varieties are grown, with white tef being considered
the best, and red tef the least desirable However, white tef is
trickier to grow, and produces less grain per acre than the red
variety. In Ethiopia, the primary use of tef is to grind it into
flour to make injera(Ketema, 1997). Injera is produced by fermenting
the flour for three days, then fried on one side to make a large
spongy griddlecake. Injera is used to serve food on, and pieces are
used as a utensil to scoop up food.
In 1986, Wayne Carlson
began growing tef in Idaho (Kelly, 03 Oct 2012). While farmers were
skeptical of the value of the crop, he has found a ready market for
tef flour in markets and restaurants that cater to East African
immigrants. Very recently, tef has begun to catch the attention of
those interested in a gluten free diet. This has resulted in
increased demand for tef flour. Tef has a distinctive flavor,
somewhat reminiscent of buckwheat (Hilson, Jan 2010). It is very
high in protein .
Tef is an ancient
grain, but one that has been unknown outside of East Africa until
recently. It is a hardy plant that grows well in semi-arid highlands,
and requires minimal tilling to plant. It is just now beginning to
move beyond it's traditional usage in Ethiopian cuisine. Because of
it has no gluten, it has caught the attention of cooks looking to
expand the available flours for a gluten free lifestyle.
Works Cited
D'Andrea,
A. Catherine, and Wadge, Pamela, “T'ef (Eragrostis
tef):
A Legacy of Pastoralism?”, Windows
on the African Past: Current Approaches to African Archaeobotany,
Africa Magna Verlag Press, 2011.
Hilson, Beth,
”Gluten-Free Flour Power”, Living Without, Jan 2010, 29 Oct 2013.
<www.livingwithout.com/issues/4_1/gluten_free_flour-1073-1.html>
Ingram,
Amanda L., and Doyle Jeff J., “The Origin and Evolution of
Eragrostis
Tef
“, American
Journal of Botany,
vol 90(1), 2003.
Kelly,
James Patrick
, “What
the Teff?”,
Boise Weekly, 03
Oct 2012, 29 Oct 2013.
<www.boiseweekly.com/boise/what-the-teff/Content?oid=2739092>
Ketema,
Seyfu, Tef,
Institute
of Plant Genetics and Crop Plant Research, 1997.
National
Research Council's Board on Science and Technology for International
Development, Lost
Crops of Africa volume I: Grains,
National Academy Press, 1996.
Monday, November 18, 2013
Spring Registration
I registered today for my spring semester classes. I will be taking cake decorating, cooking for healthy lifestyles, and sanitation.
Should be a fun and interesting semester.
Should be a fun and interesting semester.
Tuesday, October 22, 2013
Intermediate Culinary Class: Mid-term
Last week we took our mid-term for my intermediate culinary class. I'm pretty happy; I scored 49 out of 50. The only one I missed was a question about what intensifies the flavor of a vinaigrette. I picked mustard, the answer Chef wanted was vinegar. I think both answers are correct, but I'll remember the preferred answer for the final.
Wednesday, September 25, 2013
Intermediate Culinary Class: Cheese
This class is focused on taste and presentation, and this week we were exploring cheese. We a couple of cheese dishes, and while they were baking, tasted a number of cheeses.
 The first thing we put together was a baked brie. Instead of the usual jam, we had made it with toasted walnuts and cinnamon sugar. The whole thing is wrapped in puff pastry, and baked until golden brown.
I liked this version. We used a better quality brie that had no rind. The brown sugar melted and coated the walnuts. It was sweet, but not overwhelmingly so. The bottom crust of the puff pastry, infused with cheese, sugar, and walnuts was particularly tasty.
 The other thing we made was a bacon, onion, and cheddar soufflé. We sautéed bacon in butter, then added onion and garlic. We added flour to make a roux, then cream to make a béchamel sauce. Egg yolks and cheddar cheese are folded into the béchamel. That sauce is then folded into stiffly beaten egg whites. That is poured into ramekins that have been coated on the inside with butter and Parmesan cheese. The soufflés are baked for 35 minutes without peeking.
They came out appropriately fluffy. They tasted strongly of bacon, onion, and cheese. They were a bit heavy. Personally, I'd probably not use the butter, and cut the amount of bacon in half.
While the brie and soufflés were baking, we tasted a number of cheeses. Being a long time cheese fan, I was familiar with all but one of the cheeses we tried. That was Boursin, a fresh cheese, mild and smooth textured.
We also were to bring in plates for appetizers. We didn't actually use them, but Chef looked them over. He really likes the more modern plain white plates in funky shapes. He is not a fan of color. Other than our every day Ikea plates, I pretty much own no white service, at all. I have a lot of hand made pottery, and a lot of bold colors, especially blue and green.
2 oz. by wt. + enough to line ramekins butter
1 tsp. minced garlic
1/4 cup diced onion
1 1/2 Tbsp. flour
1 cup heavy cream
3 egg yolks
4 oz. by wt. shredded cheddar cheese
3 egg whites
1/2 tsp. cream of tartar
1/2 cup grated Parmesan
salt and pepper to taste
Pre-heat oven to 375 F.
Grease inside of eight ramekins with butter. Liberally coat butter with Parmesan cheese. Tap to remove excess.
In a saucepan over medium to medium high heat, melt 2 oz. butter. Add bacon, cook until fat is rendered. Add onion and garlic, cook until onion is soft. Add flour. Cook, stirring constantly for about two minutes. Add cream. Cook until thickened. Remove from heat.
In the bowl of a stand mixer, add egg whites and cream of tartar. Whip to stiff peaks.
Fold egg yolks into cream sauce, then mix in cheese.
Gently fold in egg whites 1/3 at a time into cream mixture. Ladle into ramekins.
Place ramekins on a baking sheet, and bake in oven for 35 minutes. Do not open oven door during that time.
Remove from oven, and serve immediately.
1/2 sheet frozen puff pastry
1/2 cup chopped walnuts
1 Tbsp. butter
1/4 cup brown sugar
1/8 tsp. cinnamon
1 egg, beaten
Pre-heat oven to 375 F.
Mix cinnamon into brown sugar, set aside.
In a skillet over medium heat, melt butter. Add walnuts, toss until lightly toasted.
Lay out puff pastry on a lightly floured surface. Place a circle of 1/2 the brown sugar mix in the center of the puff pastry. layer 1/2 the walnuts on top of the sugar. Place the cheese on top of the nuts. Place the rest of the sugar and nuts on top of the cheese.
Fold pastry around cheese, using egg wash to seal all overlaps. Place seam side down on a baking sheet. Brush entire surface with remaining egg wash.
Bake 20 minutes, or until golden brown.
Serve warm, with crackers or thin slices of baguette..
Happy Eating!

I liked this version. We used a better quality brie that had no rind. The brown sugar melted and coated the walnuts. It was sweet, but not overwhelmingly so. The bottom crust of the puff pastry, infused with cheese, sugar, and walnuts was particularly tasty.
 The other thing we made was a bacon, onion, and cheddar soufflé. We sautéed bacon in butter, then added onion and garlic. We added flour to make a roux, then cream to make a béchamel sauce. Egg yolks and cheddar cheese are folded into the béchamel. That sauce is then folded into stiffly beaten egg whites. That is poured into ramekins that have been coated on the inside with butter and Parmesan cheese. The soufflés are baked for 35 minutes without peeking.
 They came out appropriately fluffy. They tasted strongly of bacon, onion, and cheese. They were a bit heavy. Personally, I'd probably not use the butter, and cut the amount of bacon in half.
While the brie and soufflés were baking, we tasted a number of cheeses. Being a long time cheese fan, I was familiar with all but one of the cheeses we tried. That was Boursin, a fresh cheese, mild and smooth textured.
We also were to bring in plates for appetizers. We didn't actually use them, but Chef looked them over. He really likes the more modern plain white plates in funky shapes. He is not a fan of color. Other than our every day Ikea plates, I pretty much own no white service, at all. I have a lot of hand made pottery, and a lot of bold colors, especially blue and green.
Recipes
All recipes courtesy of Chef Joe Orate.Cheddar and Bacon Souffle
1/2 cup diced bacon2 oz. by wt. + enough to line ramekins butter
1 tsp. minced garlic
1/4 cup diced onion
1 1/2 Tbsp. flour
1 cup heavy cream
3 egg yolks
4 oz. by wt. shredded cheddar cheese
3 egg whites
1/2 tsp. cream of tartar
1/2 cup grated Parmesan
salt and pepper to taste
Pre-heat oven to 375 F.
Grease inside of eight ramekins with butter. Liberally coat butter with Parmesan cheese. Tap to remove excess.
In a saucepan over medium to medium high heat, melt 2 oz. butter. Add bacon, cook until fat is rendered. Add onion and garlic, cook until onion is soft. Add flour. Cook, stirring constantly for about two minutes. Add cream. Cook until thickened. Remove from heat.
In the bowl of a stand mixer, add egg whites and cream of tartar. Whip to stiff peaks.
Fold egg yolks into cream sauce, then mix in cheese.
Gently fold in egg whites 1/3 at a time into cream mixture. Ladle into ramekins.
Place ramekins on a baking sheet, and bake in oven for 35 minutes. Do not open oven door during that time.
Remove from oven, and serve immediately.
Brie en Croute with Walnuts
1 8 oz. wheel of brie1/2 sheet frozen puff pastry
1/2 cup chopped walnuts
1 Tbsp. butter
1/4 cup brown sugar
1/8 tsp. cinnamon
1 egg, beaten
Pre-heat oven to 375 F.
Mix cinnamon into brown sugar, set aside.
In a skillet over medium heat, melt butter. Add walnuts, toss until lightly toasted.
Lay out puff pastry on a lightly floured surface. Place a circle of 1/2 the brown sugar mix in the center of the puff pastry. layer 1/2 the walnuts on top of the sugar. Place the cheese on top of the nuts. Place the rest of the sugar and nuts on top of the cheese.
Fold pastry around cheese, using egg wash to seal all overlaps. Place seam side down on a baking sheet. Brush entire surface with remaining egg wash.
Bake 20 minutes, or until golden brown.
Serve warm, with crackers or thin slices of baguette..
Happy Eating!
Monday, September 16, 2013
Intermediate Culinary Class: Spice Rub and Condiment Exploration
The homework for today's class was to create our own signature spice rub, and to go to a store and look over some mustards, oils, vinegars, and rubs.
For the spice rub, I made up a batch of a rub I love to do for grilled steak. It's base is cocoa powder. Yes, chocolate isn't just for dessert. In fact, it was a savory spice long before the Dutch got the idea to add sugar and cream to it. I like to accent the cocoa with cumin, onion powder, coriander, and a little cayenne for a touch of heat. It also has some kosher salt. I think it gives a great crust on a grilled rib eye.
We were supposed to look over mustards, oils, rubs, and vinegars. I picked two of each to make notes about.
The two mustards that caught my eye were Jack Daniel's Hickory Smoke Mustard, and Cuisine Perel Zinfandel Orange Mustard. I've used, and loved, Jack Daniel's mustards before. This is the first time I have seen the hickory smoked, though. The Cuisine Perel looked really interesting, with wine and lots of citrus juice.
The vinegars that I found most interesting were Alessi Orange Blossom Honey Balsamic Vinegar, and Lucini Dark Cherry Balsamico. The Alessi sounded sweet and luscious. It was actually reasonably priced. The Lucini uses real aged balsamic, and is aged in a chestnut cask. I would love to get it, but it is outrageously out of my price range.
For oils, there wasn't a lot of choice, comparatively. I found a Monini Porchini Mushroom Olive Oil that looked intriguing. Because, mushrooms, duh. The other oil I noted was Argana Argan Oil. I had no idea what that was so looked it up when I got home. The argan tree is native to Morocco, and the Berbers have apparently pressing the oil from the seeds for a very long time. It is supposed to taste similar to hazelnut oil, and studies seem to indicate it is one of the healthiest of oils. It's also expensive, be argan trees only grow in Morocco, on the edge of the desert.
The spice blends/rubs I thought looked fun were The Spice Hunter Fiery Chile Fusion and Weber Kick'n Chicken.
It's fun to poke through a store and see what weird things you can find.
For the spice rub, I made up a batch of a rub I love to do for grilled steak. It's base is cocoa powder. Yes, chocolate isn't just for dessert. In fact, it was a savory spice long before the Dutch got the idea to add sugar and cream to it. I like to accent the cocoa with cumin, onion powder, coriander, and a little cayenne for a touch of heat. It also has some kosher salt. I think it gives a great crust on a grilled rib eye.
Cocoa Perfection Grilled Beef Rub
1
Tbsp. Kosher salt
1
½ Tbsp. Cocoa Powder
1
½ tsp. Cumin
1
tsp. Onion powder
1
tsp. Coriander
½
tsp. Cayenne powder
The other thing I did was go to Harvest Ranch Market in El Cajon, and poke through their shelves. It is an upscale grocery store. It has a good selection of off beat stuff. Prices range from a little high to WTF.
We were supposed to look over mustards, oils, rubs, and vinegars. I picked two of each to make notes about.
The two mustards that caught my eye were Jack Daniel's Hickory Smoke Mustard, and Cuisine Perel Zinfandel Orange Mustard. I've used, and loved, Jack Daniel's mustards before. This is the first time I have seen the hickory smoked, though. The Cuisine Perel looked really interesting, with wine and lots of citrus juice.
The vinegars that I found most interesting were Alessi Orange Blossom Honey Balsamic Vinegar, and Lucini Dark Cherry Balsamico. The Alessi sounded sweet and luscious. It was actually reasonably priced. The Lucini uses real aged balsamic, and is aged in a chestnut cask. I would love to get it, but it is outrageously out of my price range.
For oils, there wasn't a lot of choice, comparatively. I found a Monini Porchini Mushroom Olive Oil that looked intriguing. Because, mushrooms, duh. The other oil I noted was Argana Argan Oil. I had no idea what that was so looked it up when I got home. The argan tree is native to Morocco, and the Berbers have apparently pressing the oil from the seeds for a very long time. It is supposed to taste similar to hazelnut oil, and studies seem to indicate it is one of the healthiest of oils. It's also expensive, be argan trees only grow in Morocco, on the edge of the desert.
The spice blends/rubs I thought looked fun were The Spice Hunter Fiery Chile Fusion and Weber Kick'n Chicken.
It's fun to poke through a store and see what weird things you can find.
Saturday, August 31, 2013
Intermediate Culinary Class: First Two Weeks
So, I've already started my next culinary class. According to the instructor, this class is less about technique, and more about taste profiles and presentation.
The first week was the usual organization stuff. We did have to choose our teams, and we did a little team building challenge, which my team won.
The second week, we talked about menus a little. We talked about writing menu item titles and descriptions. We also covered a list of criteria to use when evaluating food.
We also learned how to sharpen our knives. We got to practice on a variety of oil stones.
Part of the class assignment is putting together a 'creativity journal'. Chef's been kind of vague on what all is supposed to go in there. In an example he had available to look at, most of the entries seemed to be images from magazines, cut out and criticized on presentation. I don't think that will be my bent, but I suspect a lot of my entries on the blog will be printed out and placed in my journal.
Monday, August 26, 2013
Chocolate Class: Final Project and Grade
Sorry I didn't get this up sooner. I've been crazy busy and sick since the middle of last month.
 For our final project, we were to make molded chocolates with ganache filling. We could either use a recipe from class or our own. I made dark chocolate shells with a white chocolate chili-lime ganache filling. I ran a swipe of red cocoa butter on the inside of the mold, by way of decoration.
For the filling, I adapted the vanilla lemon ganache we made earlier. I replaced the vanilla with chili oil, and used key lime zest in the cream.
Overall, it went well. I got 19.5 out of 20 on the final. My shell was perfect, very thin and super shiny. The ganache had a nice, smooth mouth feel. The lime came through nicely, though I lost the half point because chef felt the chili wasn't strong enough. I was conservative, as chili oil can be aggressive.
I did finish with an A in the class.
1 Tbsp. corn syrup
1 tsp. chili oil
zest of 4 key limes
.8 oz. by wt. cocoa butter, melted
8 oz. by wt. white chocolate
Line an 8" x 8" pan with plastic wrap.
Combine chili oil and cocoa butter, set aside.
In a small heavy saucepan over medium heat, combine cream, corn syrup, and zest. Bring just to a boil. Remove from heat, let stand 5 minutes. Return to heat, bring back just to a boil.
Strain liquid into chocolate. Let stand two minutes.
Whisk to combine. Whisk in cocoa butter mixture. When smooth, Pour into pan. Allow to cool. When thick, transfer to a pastry bag.
Happy Eating!

For the filling, I adapted the vanilla lemon ganache we made earlier. I replaced the vanilla with chili oil, and used key lime zest in the cream.
Overall, it went well. I got 19.5 out of 20 on the final. My shell was perfect, very thin and super shiny. The ganache had a nice, smooth mouth feel. The lime came through nicely, though I lost the half point because chef felt the chili wasn't strong enough. I was conservative, as chili oil can be aggressive.
I did finish with an A in the class.
Chili - Lime White Chocolate Ganache
5.4 oz. cream1 Tbsp. corn syrup
1 tsp. chili oil
zest of 4 key limes
.8 oz. by wt. cocoa butter, melted
8 oz. by wt. white chocolate
Line an 8" x 8" pan with plastic wrap.
Combine chili oil and cocoa butter, set aside.
In a small heavy saucepan over medium heat, combine cream, corn syrup, and zest. Bring just to a boil. Remove from heat, let stand 5 minutes. Return to heat, bring back just to a boil.
Strain liquid into chocolate. Let stand two minutes.
Whisk to combine. Whisk in cocoa butter mixture. When smooth, Pour into pan. Allow to cool. When thick, transfer to a pastry bag.
Happy Eating!
Wednesday, July 17, 2013
Chocolate Class: Another Molded Chocolate
Originally, the plan for last Thursday was to begin making our final project. We were supposed to make a chocolate box, decorate it, and make a dozen chocolates to go into the box. I spent the morning making a plan. I had a pattern I was going to pipe into the top of the box, and I had my recipes ready to make yellow modeling chocolate for a rose, and for the filling for my chocolates. I wrote out work schedules for both days.
When I go to class, I found that plans had changed. Chef was unhappy with the process on the day before, and felt we needed more practice before the practical. The practical was scaled back to just one day, and the box was eliminated, leaving only the molded chocolates for the final.
 Instead, we made more molded chocolates. This time we made a passion fruit ganache to fill them. To decorate, the molds were flicked with brushes dipped into melted cocoa butter with red and yellow coloring. Once that was set, the molds were filled with dark chocolate, then emptied to create a shell.
They were then filled with the passion fruit ganache, then had a tempered chocolate foot added.
Once that set, the chocolates were unmolded.
Recipe courtesy of Chef James Foran.
5 oz. passion fruit puree
3 oz. heavy cream
2 Tbsp. corn syrup
2 oz. salted butter, softened
21 oz. white chocolate
In a heavy saucepan over medium heat, combine vanilla bean, puree, cream, and corn syrup. Bring to a boil. Strain over chocolate.
Let stand two minutes. Whisk gently to combine. When smooth, add butter and whisk until smooth again.
Cool until thick enough to pipe.
Happy eating!
When I go to class, I found that plans had changed. Chef was unhappy with the process on the day before, and felt we needed more practice before the practical. The practical was scaled back to just one day, and the box was eliminated, leaving only the molded chocolates for the final.

They were then filled with the passion fruit ganache, then had a tempered chocolate foot added.
Once that set, the chocolates were unmolded.
Recipe courtesy of Chef James Foran.
Passion Fruit Vanilla Bean Ganache
1 vanilla bean, scraped5 oz. passion fruit puree
3 oz. heavy cream
2 Tbsp. corn syrup
2 oz. salted butter, softened
21 oz. white chocolate
In a heavy saucepan over medium heat, combine vanilla bean, puree, cream, and corn syrup. Bring to a boil. Strain over chocolate.
Let stand two minutes. Whisk gently to combine. When smooth, add butter and whisk until smooth again.
Cool until thick enough to pipe.
Happy eating!
Chocolate Class: Two Molded Chocolates
Our final lab was working with chocolate molds. You may have seen the flimsy thin plastic molds sold at crafts stores. We did not use those. Professional molds are hard, durable polycarbonate plastic. They are designed to get beat on the table to level fillings, and remove air bubbles.
The procedure is simple but exacting. The molds are filled with tempered chocolate. The chocolate is emptied out, and the chocolate allowed to harden. It is then filled with whatever relatively fluid ganache you want, leaving just enough space to add a thin layer of chocolate, the 'foot', to seal it. Once the foot sets, the chocolate can be unmolded.
The trick is to fill and empty the mold quickly, to get a thin shell with no air bubbles. Keeping the top of the mold clean and free of excess chocolate is a must.
 We made two different fillings. The first was the white chocolate vanilla lemon ganache we made previously, intending to dip, but that did not set up thick enough. It has a strong vanilla taste, but more lemon on the nose. It had a good consistency, but was a little sticky getting it into the piping bag. It did pipe just fine, however.
By way of decoration, my lab partner splattered the mold with some tempered milk chocolate. This produced a marbled effect that I think looks very nice.
I like the contrast between the filling and the shell. The white chocolate filling is sweet compared to the shell, but the strong lemon and vanilla flavor cuts the sweetness some.
 The other filling was a caramel milk chocolate hazelnut ganache. I really liked this one. Of course, you had me at caramel. We started by making a thin caramel, pouring it over the milk chocolate, blending everything together, then finishing by adding a little hazelnut liqueur.
This filling has a luscious mouth feel. Very smooth, and a little thinner than the lemon vanilla ganache.
For decoration, I painted one thin diagonal stripe of tempered milk chocolate. I wanted to keep it simple and elegant.
In some ways, making molded chocolates is both easier and more difficult than hand rolling or dipping. It is certainly faster to produce large quantities of chocolates. It is more exacting, however. While variation in the product is part of the charm of hand rolled truffles, molded chocolates are expected to be perfect, and without flaws. Bubbles, cracks, blooms, or thick or uneven shells are not acceptable.
All recipes courtesy of Chef James Foran.
1 Tbsp. corn syrup
½ vanilla bean
zest of 1 lemon
8 oz. by wt. white chocolate
Line an 8" x 8" pan with plastic wrap.
Split and scrape vanilla bean.
In a small heavy saucepan over medium heat, combine cream, corn syrup, vanilla bean and scrapings, and zest. Bring just to a boil. Remove from heat, let stand 5 minutes. Return to heat, bring back just to a boil.
Strain liquid into chocolate. Let stand two minutes.
Whisk to combine. When smooth, Pour into pan. Allow to cool. When thick, transfer to a pastry bag.
¾ oz. Cocoa butter
3 ¾ oz. sugar
1 ½ oz. water
9 oz. Cream
¾ oz. Corn syrup
½ tsp. Salt
1 ½ oz. butter – soft
1 ½ Tbsp. hazelnut liqueur
In a bowl, combine chocolate and cocoa butter, set aside.
In a small heavy saucepan over medium to medium high heat, dissolve sugar in water. Cook to a medium amber color. Remove from heat. Add cream carefully, in three stages, while continuously whisking.
When well combined, add corn syrup and salt. Return to heat, bring to a boil.
Pour over chocolate, let stand two minutes. Whisk together until smooth. Add butter, whisk until smooth. Add liqueur, whisk until smooth. Allow to set until thick enough to pipe.
Happy Eating!
The procedure is simple but exacting. The molds are filled with tempered chocolate. The chocolate is emptied out, and the chocolate allowed to harden. It is then filled with whatever relatively fluid ganache you want, leaving just enough space to add a thin layer of chocolate, the 'foot', to seal it. Once the foot sets, the chocolate can be unmolded.
The trick is to fill and empty the mold quickly, to get a thin shell with no air bubbles. Keeping the top of the mold clean and free of excess chocolate is a must.

By way of decoration, my lab partner splattered the mold with some tempered milk chocolate. This produced a marbled effect that I think looks very nice.
I like the contrast between the filling and the shell. The white chocolate filling is sweet compared to the shell, but the strong lemon and vanilla flavor cuts the sweetness some.
 The other filling was a caramel milk chocolate hazelnut ganache. I really liked this one. Of course, you had me at caramel. We started by making a thin caramel, pouring it over the milk chocolate, blending everything together, then finishing by adding a little hazelnut liqueur.
This filling has a luscious mouth feel. Very smooth, and a little thinner than the lemon vanilla ganache.
For decoration, I painted one thin diagonal stripe of tempered milk chocolate. I wanted to keep it simple and elegant.
In some ways, making molded chocolates is both easier and more difficult than hand rolling or dipping. It is certainly faster to produce large quantities of chocolates. It is more exacting, however. While variation in the product is part of the charm of hand rolled truffles, molded chocolates are expected to be perfect, and without flaws. Bubbles, cracks, blooms, or thick or uneven shells are not acceptable.
All recipes courtesy of Chef James Foran.
Recipes
Vanilla Lemon Ganache
5.4 oz. cream1 Tbsp. corn syrup
½ vanilla bean
zest of 1 lemon
8 oz. by wt. white chocolate
Line an 8" x 8" pan with plastic wrap.
Split and scrape vanilla bean.
In a small heavy saucepan over medium heat, combine cream, corn syrup, vanilla bean and scrapings, and zest. Bring just to a boil. Remove from heat, let stand 5 minutes. Return to heat, bring back just to a boil.
Strain liquid into chocolate. Let stand two minutes.
Whisk to combine. When smooth, Pour into pan. Allow to cool. When thick, transfer to a pastry bag.
Caramel Mill Chocolate Hazelnut Ganache
13.5 oz. Milk chocolate – chopped fine¾ oz. Cocoa butter
3 ¾ oz. sugar
1 ½ oz. water
9 oz. Cream
¾ oz. Corn syrup
½ tsp. Salt
1 ½ oz. butter – soft
1 ½ Tbsp. hazelnut liqueur
In a bowl, combine chocolate and cocoa butter, set aside.
In a small heavy saucepan over medium to medium high heat, dissolve sugar in water. Cook to a medium amber color. Remove from heat. Add cream carefully, in three stages, while continuously whisking.
When well combined, add corn syrup and salt. Return to heat, bring to a boil.
Pour over chocolate, let stand two minutes. Whisk together until smooth. Add butter, whisk until smooth. Add liqueur, whisk until smooth. Allow to set until thick enough to pipe.
Happy Eating!
Subscribe to:
Posts (Atom)